How to Apply Wood Stain
How to Apply Wood Stain Properly:
NOOOOO!!! Have you ever worked on a project for hours just to have it ruined by splotchy stain? I used to sand and use pre-stain and do everything I was supposed to when I first started woodworking, but I always ended up with an uneven finish. A warm finish can be achieved by applying a wood stain to your project. However, when applying stain on untreated wood, it's critical to follow the correct procedures. Stained wood has warmth and depth and can show off the unique grain of a wood project. And while most know the basic steps to stain wood, it’s really the nuances of the application that can make or break to look.
How to Apply Wood Stain
Here are the steps I take to get professional looking results.
Step 1: Proper Prep
It’s easy to lightly sand a fresh board and think it looks okay, but boards from the home center sometimes have a waxy coating that almost has a visible sheen. If I were to apply stain directly to this board, it wouldn’t soak in and would look splotchy. Likewise, when stained, the coloring along the grain of an unsanded board will appear mottled instead of crisp and evenly colored.
- To properly prep bare wood, first sand with 120-grit sandpaper to open the grain of the wood.
- Wipe the dust away, and then sand again with 120 grit.
- Next I wipe the dust away and then sometimes wipe the wood with a damp cloth to raise the fibers.
- Then, sand one more time with 120 or 150 grit. If you’re working with a softer wood, you can sand with a higher grit to help close the grain so it doesn’t soak in as much color, but I never really push over 180 grit, even on pine.
- It’s also really important to use a truly clean cloth to wipe away the dust between sanding, because a dirty cloth will just push the dust around. Also, use a cloth that is lint-free or else you risk leaving fibers which can get caught in the finish.
Step 2: Apply conditioner
I build a lot of my projects from soft wood like pine and plywood, so applying pre-stain conditioner is a must. But it’s equally important to wipe on the conditioner and wait for it to soak in.
For example, if I just quickly apply the conditioner and then the stain, the stain mixes with the conditioner that’s still sitting on top of the wood and waters down the color of the stain. Instead, let the conditioner soak in for at least 5-10 minutes, but no more than 2 hours, and then apply the stain.
Step 3: Coat the Wood with Stain
Once it’s time to apply the stain, I’m not too picky about how I get it on the wood, whether it’s a brush, sponge, or cloth. Depending on the application, I reach a simple chip brush for flat surfaces, a sponge brush if my project has any grooves or tight corners, and a cloth if I’m working with thin pieces and want to avoid drips along the edges.
The key to getting the stain on the wood is not to splatter or create an end-point where the stain soaks in and appears darker. In general, I like to complete my most visible edges first so the stain doesn’t drip, and then work nearby open areas in long, full passes.
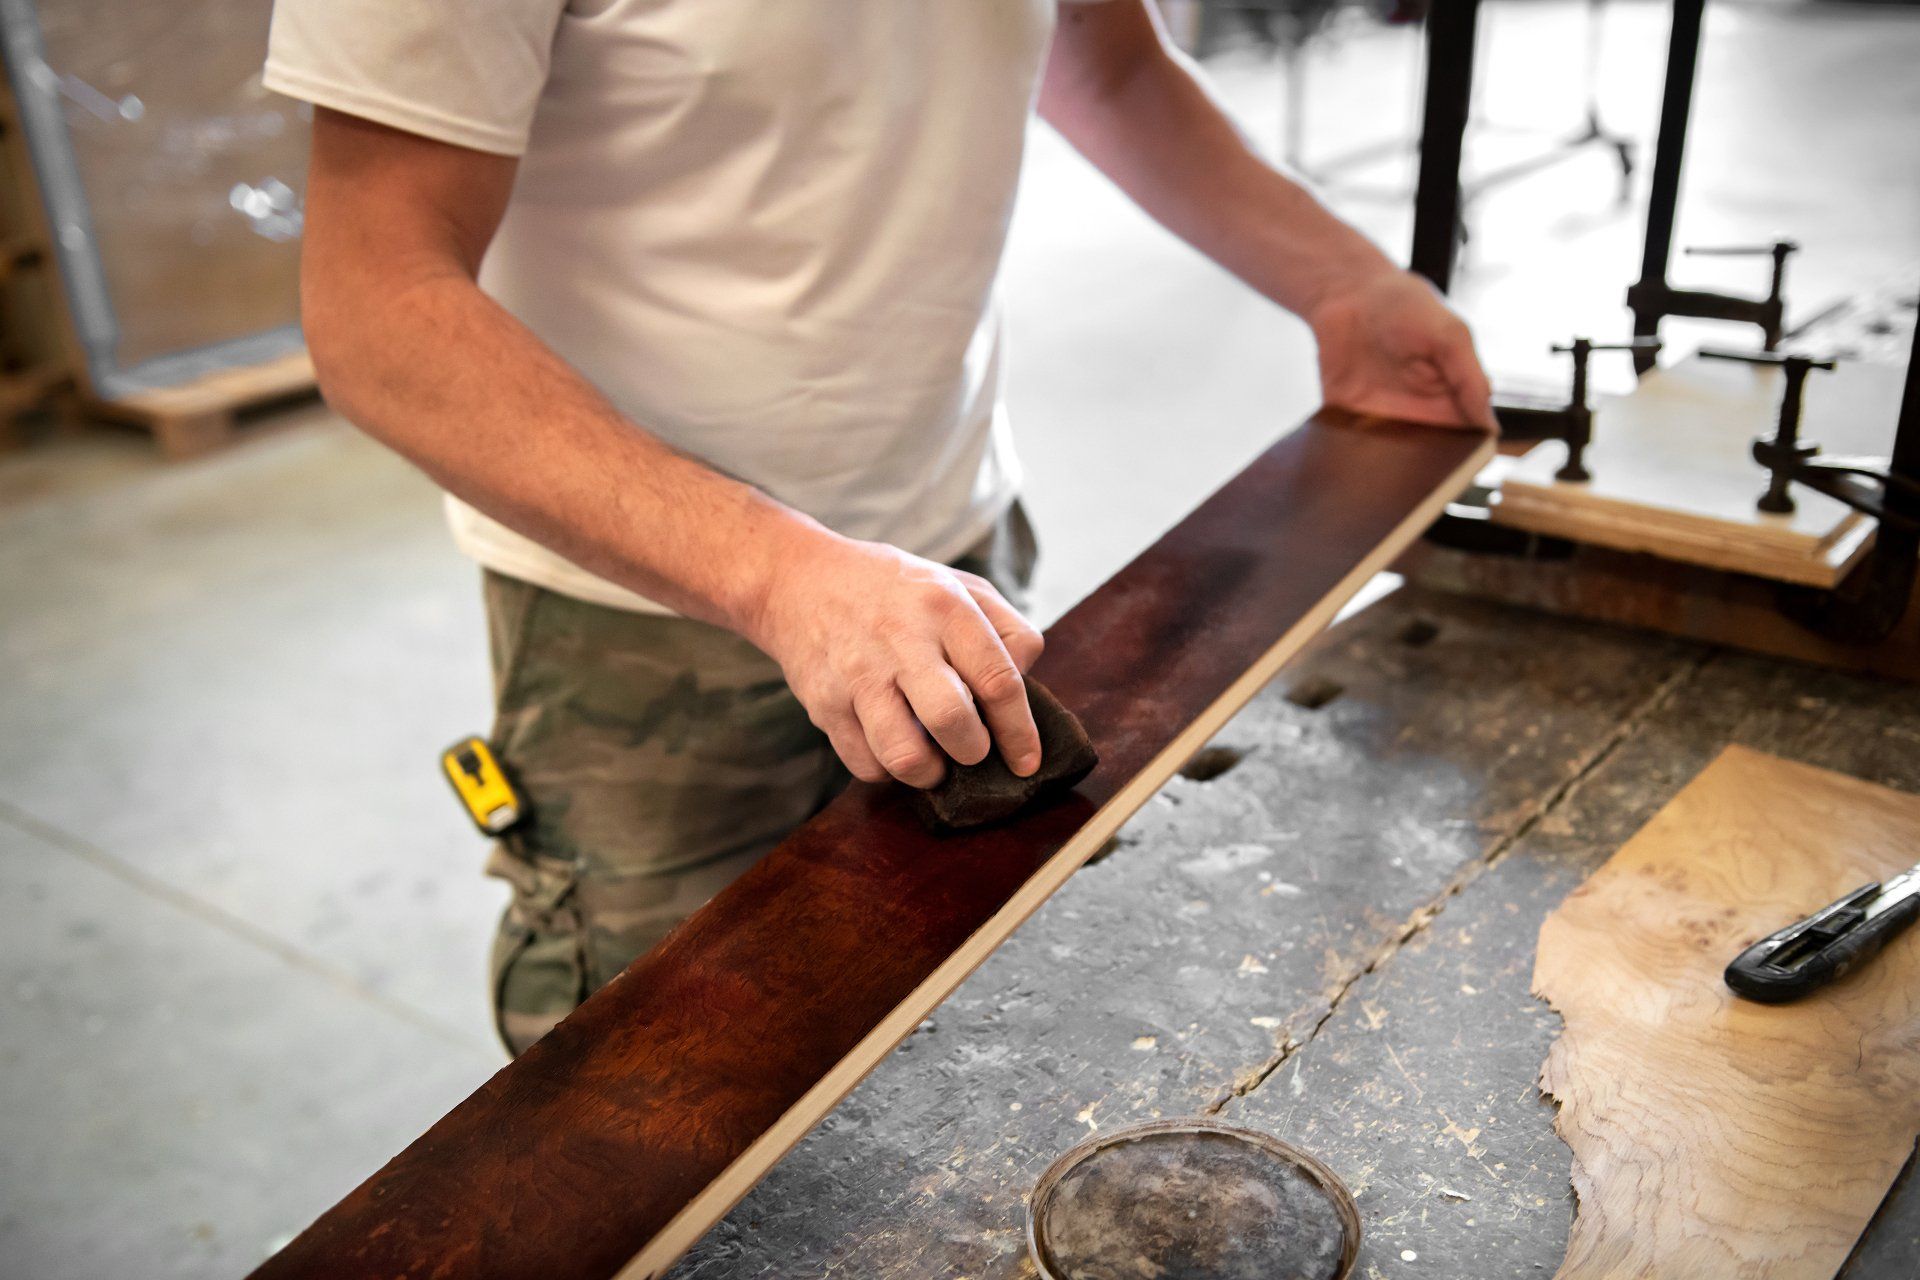
Step 4: Wipe off the Excess
When it comes times to wipe off the excess stain, technique matters. A balled-up rag rubbed haphazardly over the stain will create little lines as it drags through the stain. Instead, I fold a cloth with the edges tucked inside, and then pull the smooth fold over the wood in the direction of the grain—again in long, even passes.
Once you’ve wiped off the excess, fight the urge to keep wiping, as this causes the stain to pull as it gets tacky. I typically let my stain dry overnight to be sure none will pick up as I apply the protective top coat.
In the morning, my dark stain always looks like mud, and the grain isn’t crisp. Don’t panic—the contrast is highlighted in the final step.
Step 5: Apply a Topcoat
The last step is to apply a topcoat to protect the stain. I like the warmth of traditional polyurethane or shellac, but you can also reach for a water-based product depending on your preference.
Whatever you choose, mix it in a figure 8 motion, don’t shake the can or else you’ll have bubbles in your finish. Apply it with a high-quality brush first coating the surface and then lightly pulling the brush in long, even passes to smooth it out. Just as with the stain, fight the urge to over brush the poly, or else it too will start to pull and won’t lay smooth.
The key to a clear smooth finish is to allow the finish to dry, and then lightly sand it with 180 grit sandpaper, wipe away the dust, and then apply one last coat. This is always the game changer on my finish and gives it the smoothest, most professional-looking feel.